Web Development with Python Tutorial
Objective
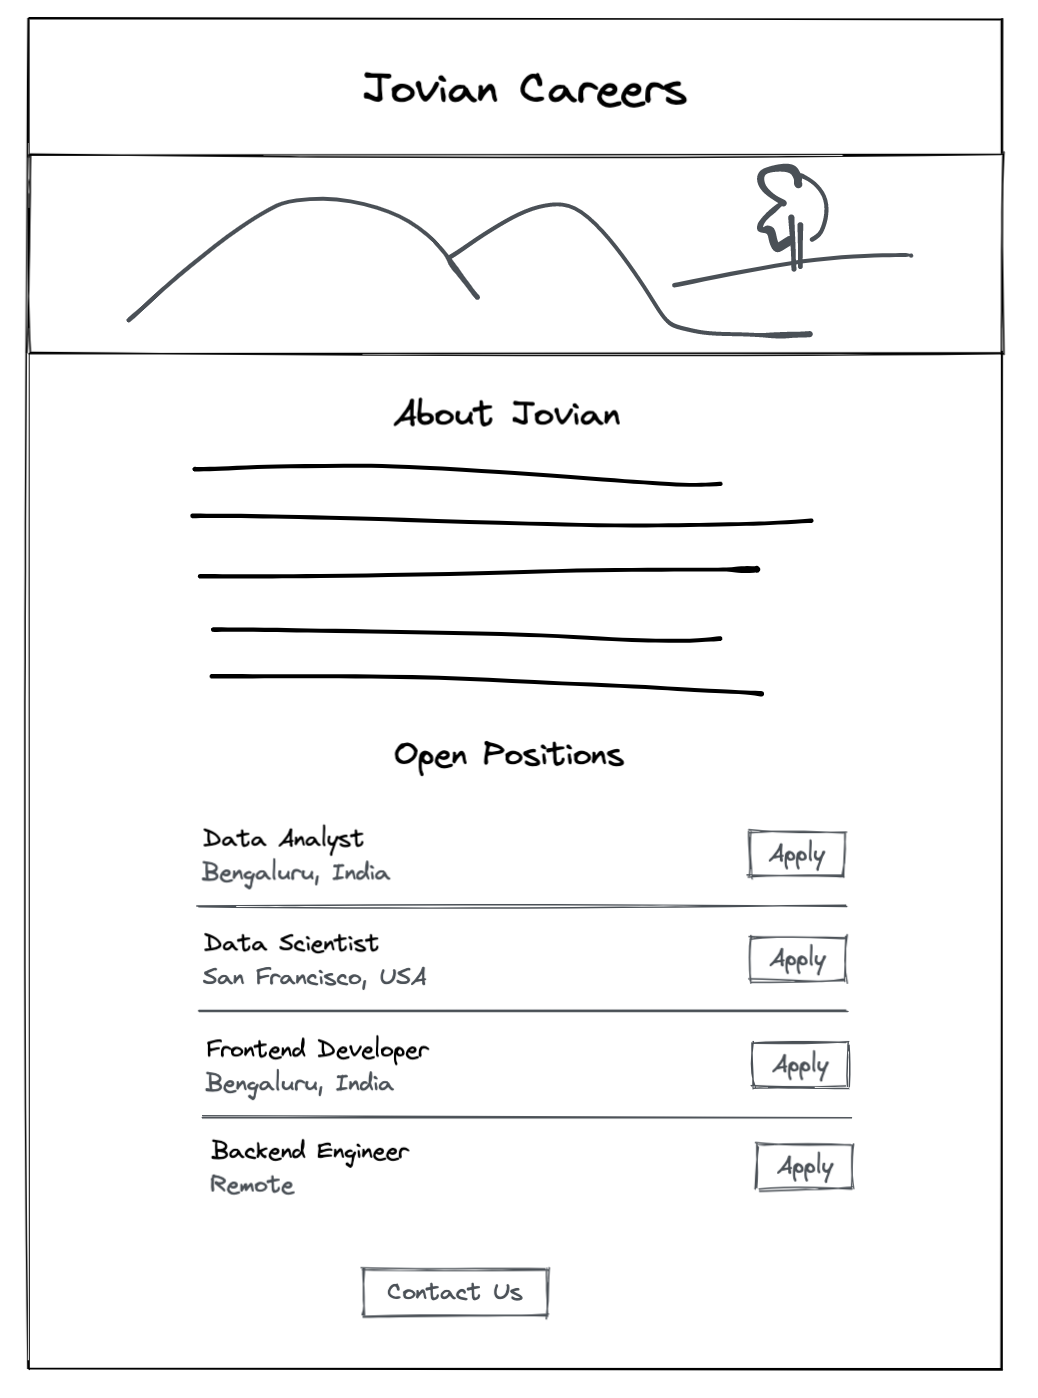
- Create a “Jovian Careers” website listing job openings at Jovian
- Use a modern HTML & CSS framework
Bootstrapfor layout and styling - Deploy the website to the cloud via
Render.comand attach a custom domain is aTODO
Step 1 - Project Setup & Flask Basic
- Create a project on GitHub
- Open up the project on Replit
- Create and run a Flask web server
- Push changes back to GitHub
I will have a sub heading for things I feel like I need to do some documentation
Create a project on GitHub
Something cool and useful I learned is that you can add a .gitignore template while you are creating the project. Since this project is mostly in Python, you can choose the .gitignore template of Python. This can come very handy when you just want to use the cmd $ git add . and not worrying files you don’t want to push by accident.
Create and run a Flask web server
Installation
$ pip install Flask
Creating a Simple Flask Application
First, create a app.py file in the project directory. A simple code template for Flask project would look like this:
from flask import Flask

app = Flask(__name__)

@app.route("/")
def hello_world():
    return "<p>Hello, World!</p>"
Then, you can run the project by running $ python app.py
Step 2 - Web Pages with HTML & CSS
- Render templates and use static assets
- Create the layout of the page using HTML tags
- Style the page using CSS classes, properties, and values
- Use the
Bootstrapframework for faster development
Render templates and use static assets
First, create a folder called templates.
Then, Within our templates folder, we initialize our html file - home.html which contains the information and layout of what we want to show on our route page.
If you are not so familiar with html, check out this html tutorial.
Once you have done all of the above, you can change the app.py to:
from flask import Flask, render_template

app = Flask(__name__)

@app.route("/")
def hello_world():
  return render_template('home.html')

if __name__ = '__main__'
  app.run(host='0.0.0.0', debug=True)
Use the Bootstrap framework for faster development
Now before we start any real development on the html page, you should grab pen and paper to just draw the general layout of the page(s) instead of just start coding. This will serve as a general guideline for you to build you website.
Using Bootstrap for faster Development
Instead of typing whole CSS manually for every website, you can use a pre existing set of styles that have been created by some good designers.
You can head to Bootstrap’s quickstart guide: https://getbootstrap.com/docs/5.2/getting-started/introduction/, and follow the steps below to add some extra tags within the <head> tag to ensure the proper working of bootstrap:
- Add the follwing meta tags:
<meta charset="utf-8">
<meta name="viewport" content="width=device-width, initial-scale=1">
- For CSS add a link tag:
<link href="https://cdn.jsdelivr.net/npm/bootstrap@5.2.0/dist/css/bootstrap.min.css" rel="stylesheet" integrity="sha384-gH2yIJqKdNHPEq0n4Mqa/HGKIhSkIHeL5AyhkYV8i59U5AR6csBvApHHNl/vI1Bx" crossorigin="anonymous">
This contains some pre-existing styles that immediately get applied to our page. You can reload and see the changes straight away. So now, all we need to do is add appropriate classes to style our website according to preexisting styles by bootstrap developers.
Let’s look at a few classes we will add to make our website look more presentable and ready.
-
For Centre Aligning your text:
class = "text-center" - Margin Top:
mt-margin_size - Margin Bottom:
mb-margin_size
For any feature you want, you can always look up into the bootstrap documentation. A quick search for any thing is to do cmd + k in Bootstrap documentation.
Step 3 - Dynamic Data & Cloud Deployment
- Render dynamic data using Jinja template tags
- Add an API route to return JSON
- Deploy the project to Render.com
- Connect a domain with Render deployment
Render Dynamic Data using Jinja template tags
We will create a dictionary of jobs that mimic things that would be returned from a database.
from flask import Flask, render_template, jsonify

app = Flask(__name__)

JOBS=[
  {
    'id': 1,
    'title': 'Data Analyst',
    'location': 'Bengaluru, India',
    'salary': 'Rs. 100,000'
  },
  {
    'id': 2,
    'title': 'Data Engineer',
    'location': 'Delhi, India',
    'salary': 'Rs. 150,000'
  },
  {
    'id': 3,
    'title': 'Frontend Engineer',
    'location': 'Remote'
  },
  {
    'id': 4,
    'title': 'Backend Engineer',
    'location': 'San Francisco, USA',
    'salary': '$150,000'
  }
]
templates
We will add an argument in render_template as jobs
@app.route("/")
def hello_world():
  return render_template('home.html',
                        jobs=JOBS)
Then inside home.html, if you do ``, you will see that the dictionary was displayed as strings in your page.
You can also use these following code to render it nicely:
  {% for job in jobs %}
    {% include 'jobItems.html' %}
  {% endfor %}
Then inside the jobItems.html:
<div class="mb-4 border-bottom pb-3 row">
  <div class="col-10">
    <h4>{{job['title']}}</h4>
    <div><b>Location:</b> {{job['location']}}</div>
    {% if 'salary' in job %}
    <div><b>Salary:</b> {{job['salary']}}</div>
    {% endif %}
  </div>
  <div class="col-2 text-right">
    <button type="button" class="btn btn-outline-primary align-middle">Apply</button>
  </div>
</div>
Adding API Route to Return JSON
First we willl need to add the function jsonify, just include the library. Then add:
@app.route("/api/jobs")
def list_jobs():
  return jsonify(JOBS)
Once you did that, at the home url, you could do /api/jobs, and you will see the dictionary to be returned.